Prometheus服务端安装
Prometheus 是一个开放性的监控解决方案,用户可以非常方便的安装和使用 Prometheus 并且能够非常方便的对其进行扩展。为了能够更加直观的了解 Prometheus Server,接下来我们将在本地部署并运行一个 Prometheus Server实例,通过 Node Exporter 采集当前主机的系统资源使用情况。 并通过 Grafana 创建一个简单的可视化仪表盘。
Prometheus 基于 Golang 编写,编译后的软件包,不依赖于任何的第三方依赖。用户只需要下载对应平台的二进制包,解压并且添加基本的配置即可正常启动 Prometheus Server。具体安装过程可以参考如下内容。
安装配置 Prometheus Server
本次我们选择在 CentOS7 上安装 prometheus ,其他系统安装过程类似,这里不再一一赘述
为了安全,我们这里不用 root 用户启动相关服务,而是用我们自建的 prometheus 用户启动服务,首先需要创建一个用户:
 ➜ groupadd prometheus
 ➜ useradd -g prometheus -M -s /sbin/nologin prometheus
我们需要从 prometheus下载页 下载我们需要安装的版本,这里我们选择则安装的 prometheus 版本是 v2.7.1 的最新版本。
➜ wget https://github.com/prometheus/prometheus/releases/download/v2.7.1/prometheus-2.7.1.linux-amd64.tar.gz
解压并安装 prometheus 服务:
 ➜ tar xf prometheus-2.22.2.linux-amd64.tar -C /srv/
 ➜ cd /soft/
 ➜ mv prometheus-2.22.2.linux-amd64/ prometheus
 ➜ mkdir -pv /soft/prometheus/data
 ➜ chown -R prometheus.prometheus /soft/prometheus
创建 prometheus 系统服务启动文件 /usr/lib/systemd/system/prometheus.service:
 [Unit]
 Description=Prometheus Server
 Documentation=https://prometheus.io/docs/introduction/overview/
 After=network-online.target

 [Service]
 User=prometheus
 Restart=on-failure
 ExecStart=/soft/prometheus/prometheus \
   --config.file=/soft/prometheus/prometheus.yml \
   --storage.tsdb.path=/srv/prometheus/data
 ExecReload=/bin/kill -HUP $MAINPID
 [Install]
 WantedBy=multi-user.target
修改 prometheus 配置文件 /srv/prometheus/prometheus.yml:
 ➜ grep -v '^#' /srv/prometheus/prometheus.yml
 global:
   scrape_interval:     15s
   evaluation_interval: 15s

 alerting:
   alertmanagers:
   - static_configs:
     - targets: ["localhost:9093"]

 rule_files:
   #- "alert.rules"

 scrape_configs:
   # The job name is added as a label `job=<job_name>` to any timeseries scraped from this config.
   - job_name: 'DORIS_CLUSTER' # 每一个 Doris 集群,我们称为一个 job。这里可以给 job 取一个名字,作为 Doris 集群在监控系统中的名字。
     metrics_path: '/metrics' # 这里指定获取监控项的 restful api。配合下面的 targets 中的 host:port,Prometheus 最终会通过 host:port/metrics_path 来采集监控项。
     static_configs: # 这里开始分别配置 FE 和 BE 的目标地址。所有的 FE 和 BE 都分别写入各自的 group 中。
       - targets: ['doris01:8030']
         labels:
           group: fe # 这里配置了 fe 的 group,该 group 中包含了 3 个 Frontends

       - targets: ['doris02:8040', 'doris03:8040', 'doris04:8040', 'doris05:8040', 'doris06:8040', 'doris07:8040']
         labels:
           group: be # 这里配置了 be 的 group,该 group 中包含了 3 个 Backends
   - job_name: 'prometheus'

     # metrics_path defaults to '/metrics'
     # scheme defaults to 'http'.

     static_configs:
     - targets: ['localhost:9090']
启动服务:
 ➜ systemctl daemon-reload
 ➜ systemctl start prometheus.service
 ➜ systemctl enable prometheus.service
 ➜ systemctl status prometheus.service
Prometheus 服务支持热加载配置:
➜ systemctl reload prometheus.service
Prometheus 服务启动完成后,可以通过http://localhost:9090访问 Prometheus 的 UI 界面。
安装 Grafana 展示工具
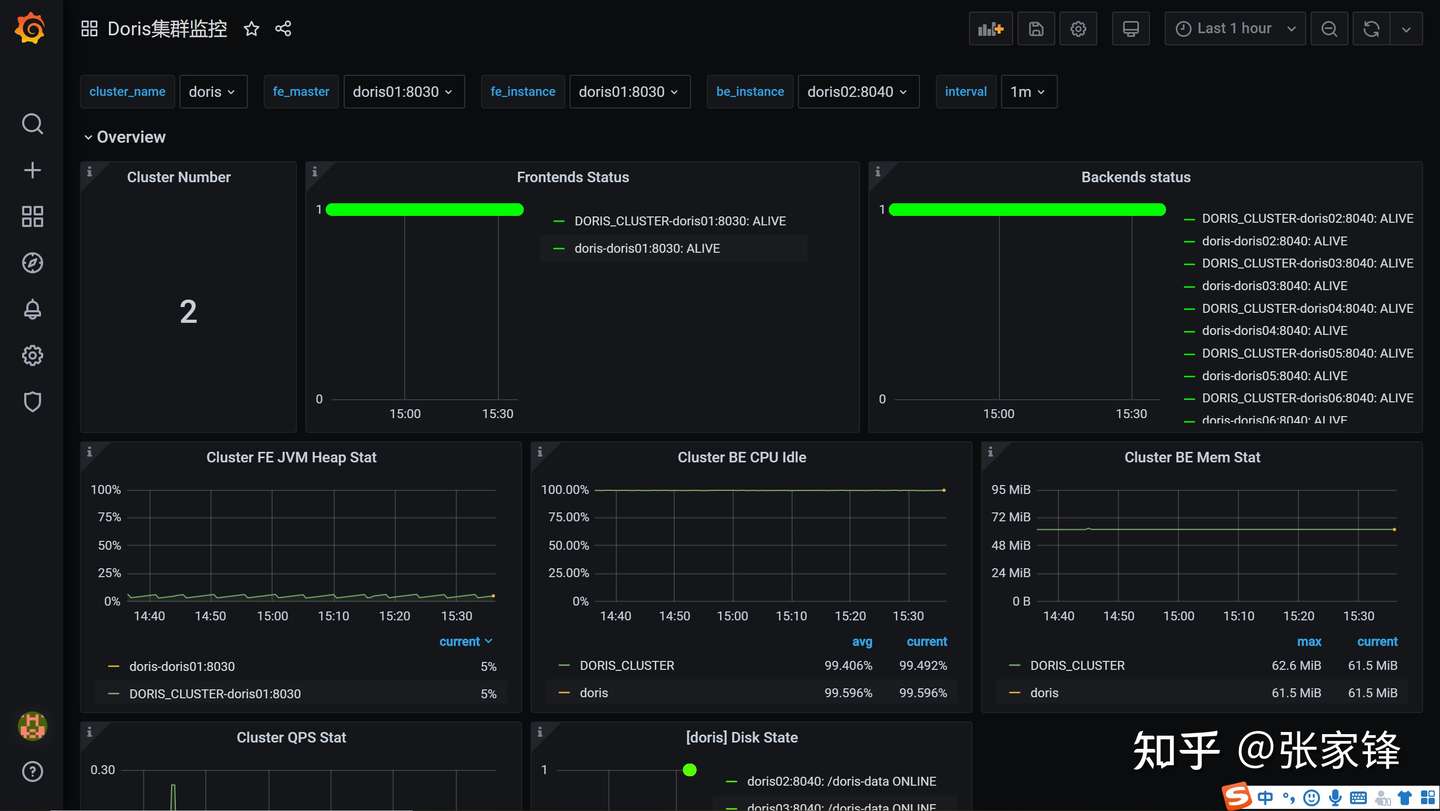
Grafana 我们主要用它来展示 Prometheus 的监控指标的,这样可以直观查看各节点或者服务的状态,本次安装 grafana 我们直接用 yum 安装即可,具体操作也可以参考官方文档
写在rpm安装包
wget https://dl.grafana.com/oss/release/grafana-7.3.3-1.x86_64.rpm
启动grafana
设置grafana服务开机自启,并启动服务
 #  systemctl daemon-reload
 #  systemctl enable grafana-server.service
 #  systemctl start grafana-server.service
访问grafana
浏览器访问http://192.168.56.200:3000(IP:3000端口),即可打开grafana页面,默认用户名密码都是admin,初次登录会要求修改默认的登录密码

然后定义数据源,定义Dashboard或者导入Dashboard json文件


