Apache Doris BE 开发环境搭建
前期准备工作
本教程是在Ubuntu 20.04下进行的
-
下载doris源代码
下载地址为:apache/incubator-doris: Apache Doris (Incubating) (github.com)
-
安装GCC 8.3.1+,Oracle JDK 1.8+,Python 2.7+,确认 gcc, java, python 命令指向正确版本, 设置 JAVA_HOME 环境变量
-
安装其他依赖包
sudo apt install build-essential openjdk-8-jdk maven cmake byacc flex automake libtool-bin bison binutils-dev libiberty-dev zip unzip libncurses5-dev curl git ninja-build python brotli
sudo add-apt-repository ppa:ubuntu-toolchain-r/ppa
sudo apt update
sudo apt install gcc-10 g++-10
sudo apt-get install autoconf automake libtool autopoint

安装openssl-devel:
sudo apt install -y openssl-devel
编译
以下操作步骤在/home/zhangfeng目录下进行
- 下载源码
git clone https://github.com/apache/incubator-doris.git
- 编译第三方依赖包
 cd /home/zhangfeng/incubator-doris/thirdparty
 ./build-thirdparty.sh
- 编译doris产品代码
cd /home/zhangfeng/incubator-doris
./build.sh
注意:这个编译有以下几条指令:
./build.sh  #同时编译be 和fe
./build.sh  --be #只编译be
./build.sh  --fe #只编译fe
./build.sh  --fe --be#同时编译be fe
./build.sh  --fe --be --clean#删除并同时编译be fe
./build.sh  --fe  --clean#删除并编译fe
./build.sh  --be  --clean#删除并编译be
./build.sh  --be --fe  --clean#删除并同时编译be fe
如果不出意外,应该会编译成功,最终的部署文件将产出到 /home/zhangfeng/incubator-doris/output/ 目录下。如果还遇到其他问题,可以参照doris的安装文档http://doris.apache.org。
部署调试
- 给be编译结果文件授权
chmod /home/zhangfeng/incubator-doris/output/be/lib/palo_be
注意: /home/zhangfeng/incubator-doris/output/be/lib/palo_be为be的执行文件。
- 创建数据存放目录
通过查看/home/zhangfeng/incubator-doris/output/be/conf/be.conf
# INFO, WARNING, ERROR, FATAL
sys_log_level = INFO
be_port = 9060
be_rpc_port = 9070
webserver_port = 8040
heartbeat_service_port = 9050
brpc_port = 8060

# Note that there should at most one ip match this list.
# If no ip match this rule, will choose one randomly.
# use CIDR format, e.g. 10.10.10.0/
# Default value is empty.
priority_networks = 192.168.59.0/24 # data root path, seperate by ';'
storage_root_path = /soft/be/storage
# sys_log_dir = ${PALO_HOME}/log
# sys_log_roll_mode = SIZE-MB-
# sys_log_roll_num =
# sys_log_verbose_modules =
# log_buffer_level = -
# palo_cgroups
需要创建这两个文件夹,这是be数据存放的地方
mkdir -p /soft/be/storage
- 打开vscode,并打开be源码所在目录,在本案例中打开目录为/home/workspace/incubator-doris/
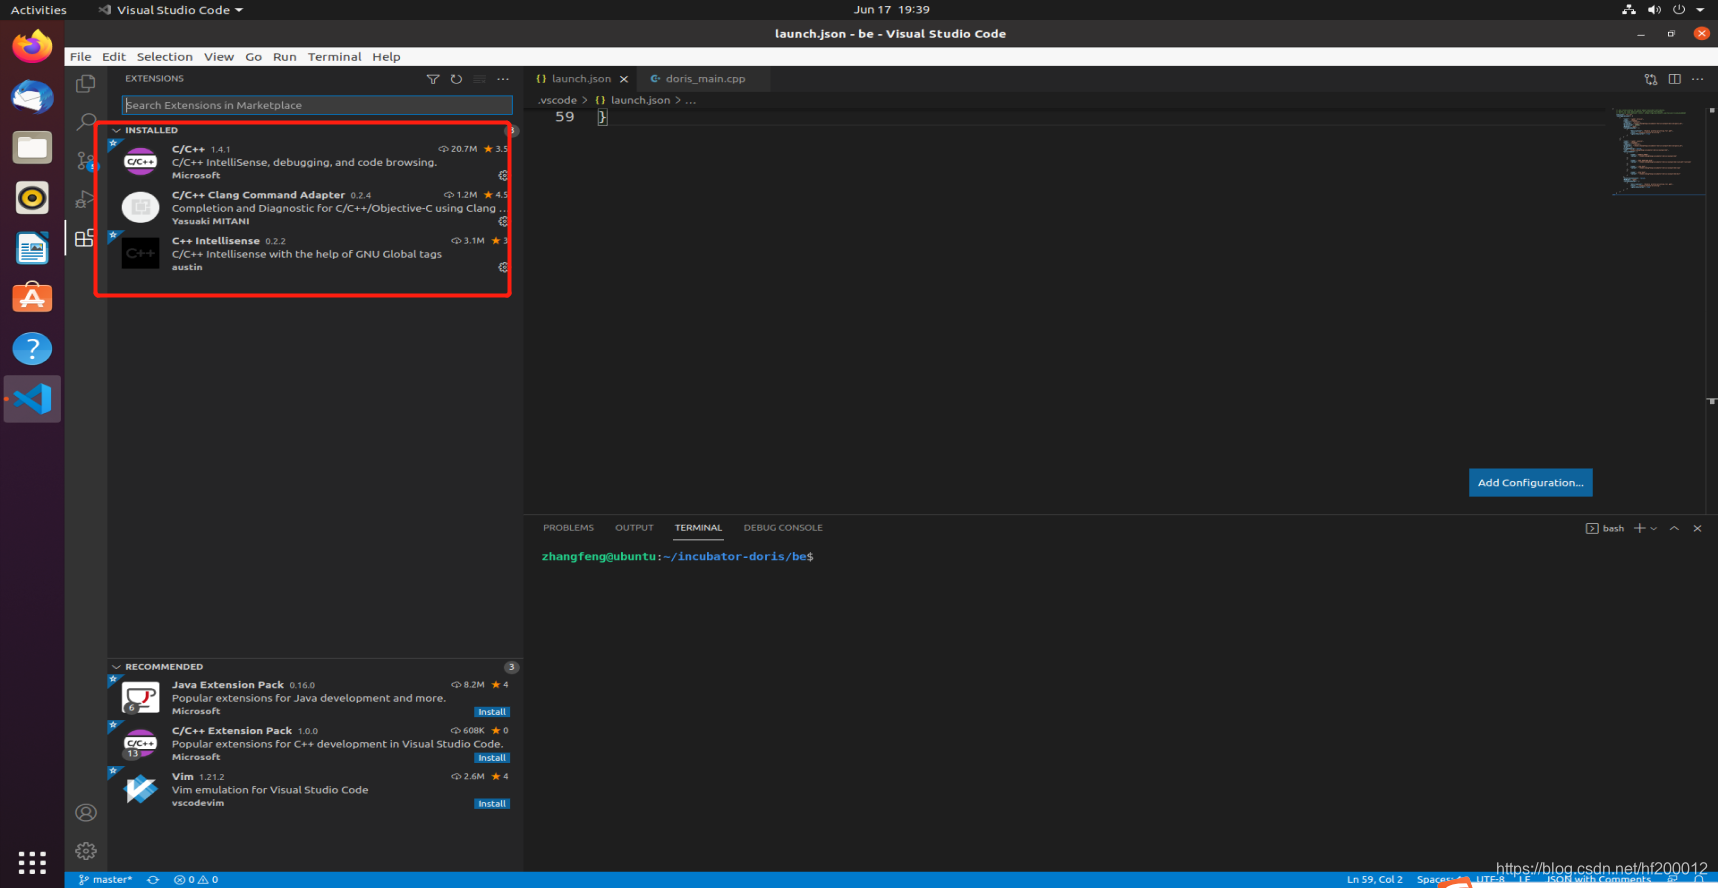
- 安装vscode ms c++调试插件
- 创建launch.json文件,文件内容如下:
{
    "version": "0.2.0",
    "configurations": [
        {
            "name": "(gdb) Launch",
            "type": "cppdbg",
            "request": "launch",
            "program": "/home/workspace/incubator-doris/output/be/lib/palo_be",
            "args": [],
            "stopAtEntry": false,
            "cwd": "/home/workspace/incubator-doris/",
            "environment": [{"name":"PALO_HOME","value":"/home/zhangfeng/incubator-doris/output/be/"},
                            {"name":"UDF_RUNTIME_DIR","value":"/home/zhangfeng/incubator-doris/output/be/lib/udf-runtime"},
                            {"name":"LOG_DIR","value":"/home/zhangfeng/incubator-doris/output/be/log"},
                            {"name":"PID_DIR","value":"/home/zhangfeng/incubator-doris/output/be/bin"}
                           ],
            "externalConsole": true,
            "MIMode": "gdb",
            "setupCommands": [
                {
                    "description": "Enable pretty-printing for gdb",
                    "text": "-enable-pretty-printing",
                    "ignoreFailures": true
                }
            ]
        }
    ]
}
其中,environment定义了几个环境变量DORIS_HOME UDF_RUNTIME_DIR LOG_DIR PID_DIR,这是palo_be运行时需要的环境变量,如果没有设置,启动会失败。
注意:如果希望是attach(附加进程)调试,配置代码如下:
{
    "version": "0.2.0",
    "configurations": [
        {
          "name": "(gdb) Launch",
          "type": "cppdbg",
          "request": "attach",
          "program": "/home/zhangfeng/incubator-doris/output/lib/palo_be",
          "processId":,
          "MIMode": "gdb",
          "internalConsoleOptions":"openOnSessionStart",
          "setupCommands": [
                {
                    "description": "Enable pretty-printing for gdb",
                    "text": "-enable-pretty-printing",
                    "ignoreFailures": true
                }
            ]
        }
    ]
}
配置中 “request”: “attach”, “processId”:17016,这两个配置节是重点: 分别设置gdb的调试模式为attach,附加进程的processId,否则会失败。如何查找进程id,可以在命令行中输入以下命令:
ps -ef | grep palo*
如图:
其中的15200即为当前运行的be的进程id.
一个完整的lainch.json的例子如下:
 {
    "version": "0.2.0",
    "configurations": [
        {
            "name": "(gdb) Attach",
            "type": "cppdbg",
            "request": "attach",
            "program": "/home/zhangfeng/incubator-doris/output/be/lib/palo_be",
            "processId": 17016,
            "MIMode": "gdb",
            "setupCommands": [
                {
                    "description": "Enable pretty-printing for gdb",
                    "text": "-enable-pretty-printing",
                    "ignoreFailures": true
                }
            ]
        },
        {
            "name": "(gdb) Launch",
            "type": "cppdbg",
            "request": "launch",
            "program": "/home/zhangfeng/incubator-doris/output/be/lib/palo_be",
            "args": [],
            "stopAtEntry": false,
            "cwd": "/home/zhangfeng/incubator-doris/output/be",
            "environment": [
                {
                    "name": "DORIS_HOME",
                    "value": "/home/zhangfeng/incubator-doris/output/be"
                },
                {
                    "name": "UDF_RUNTIME_DIR",
                    "value": "/home/zhangfeng/incubator-doris/output/be/lib/udf-runtime"
                },
                {
                    "name": "LOG_DIR",
                    "value": "/home/zhangfeng/incubator-doris/output/be/log"
                },
                {
                    "name": "PID_DIR",
                    "value": "/home/zhangfeng/incubator-doris/output/be/bin"
                }
            ],
            "externalConsole": false,
            "MIMode": "gdb",
            "setupCommands": [
                {
                    "description": "Enable pretty-printing for gdb",
                    "text": "-enable-pretty-printing",
                    "ignoreFailures": true
                }
            ]
        }
    ]
}
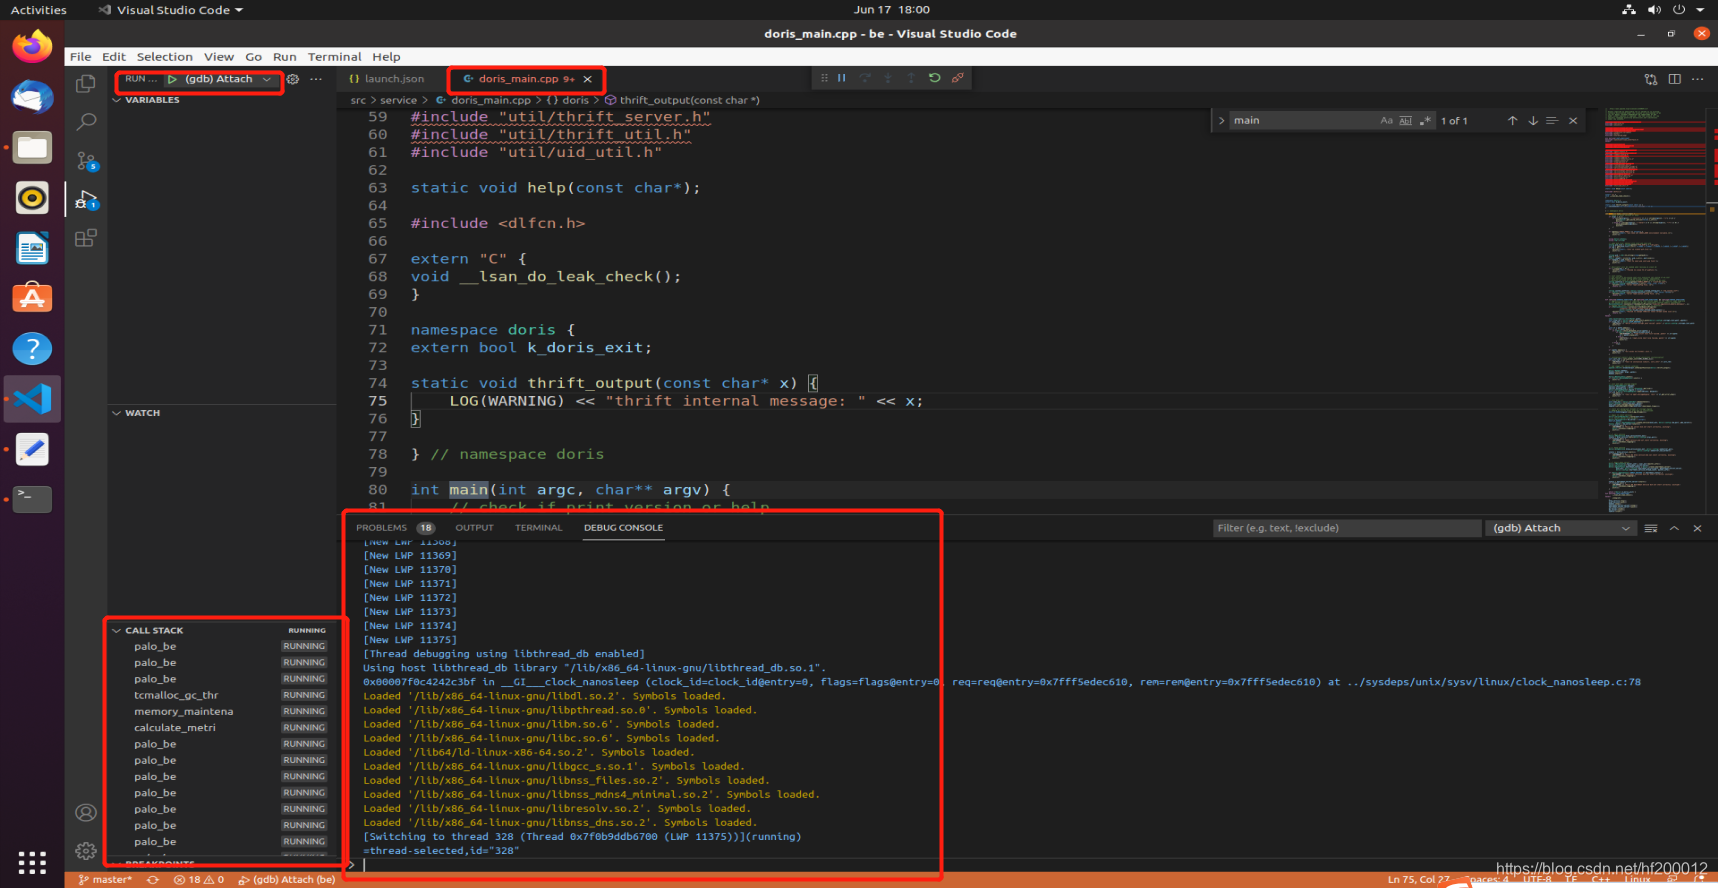
6.点击调试即可